If you are 😁 and You Know it

Grab and 🍎 .

Snap a πŸ“· .

Try a new recipe.

I love teaming up with Honeybear Brand Apples to bring you guys some fun facts and recipes! Did you know that for a limited time the apples will have 4 different emoji stickers on them? I love this idea as a way to spread more JOY!

Do you struggle with getting your kids to eat fruit? Check out my recipe below! Also save the stickers as they eat the apple and create a chart to show them how many apples they have eaten in a week or even a month!

Do you already write little notes in your child’s lunchbox? Add an emoji apple next time! I love the hangry one because I can totally relate 😬

IMG_7003.JPG

So I have a fun challenge for you! If you are at your grocery store and you spot the apples with the emoji stickers (Gala or Honeycrisp variety) grab them, find your emotion, and snap a selfie with it and tag @hyvee and ME @ladyandredstyle so I can share them on my Instagram stories too! Let’s spread some cheer and fun around social media!

You can find the apples if you are local to Des Moines at your nearest HyVee grocery stores. For more information on the Honeybear brands, you can check out their website HERE and make sure to follow them on Facebook and Instagram too!

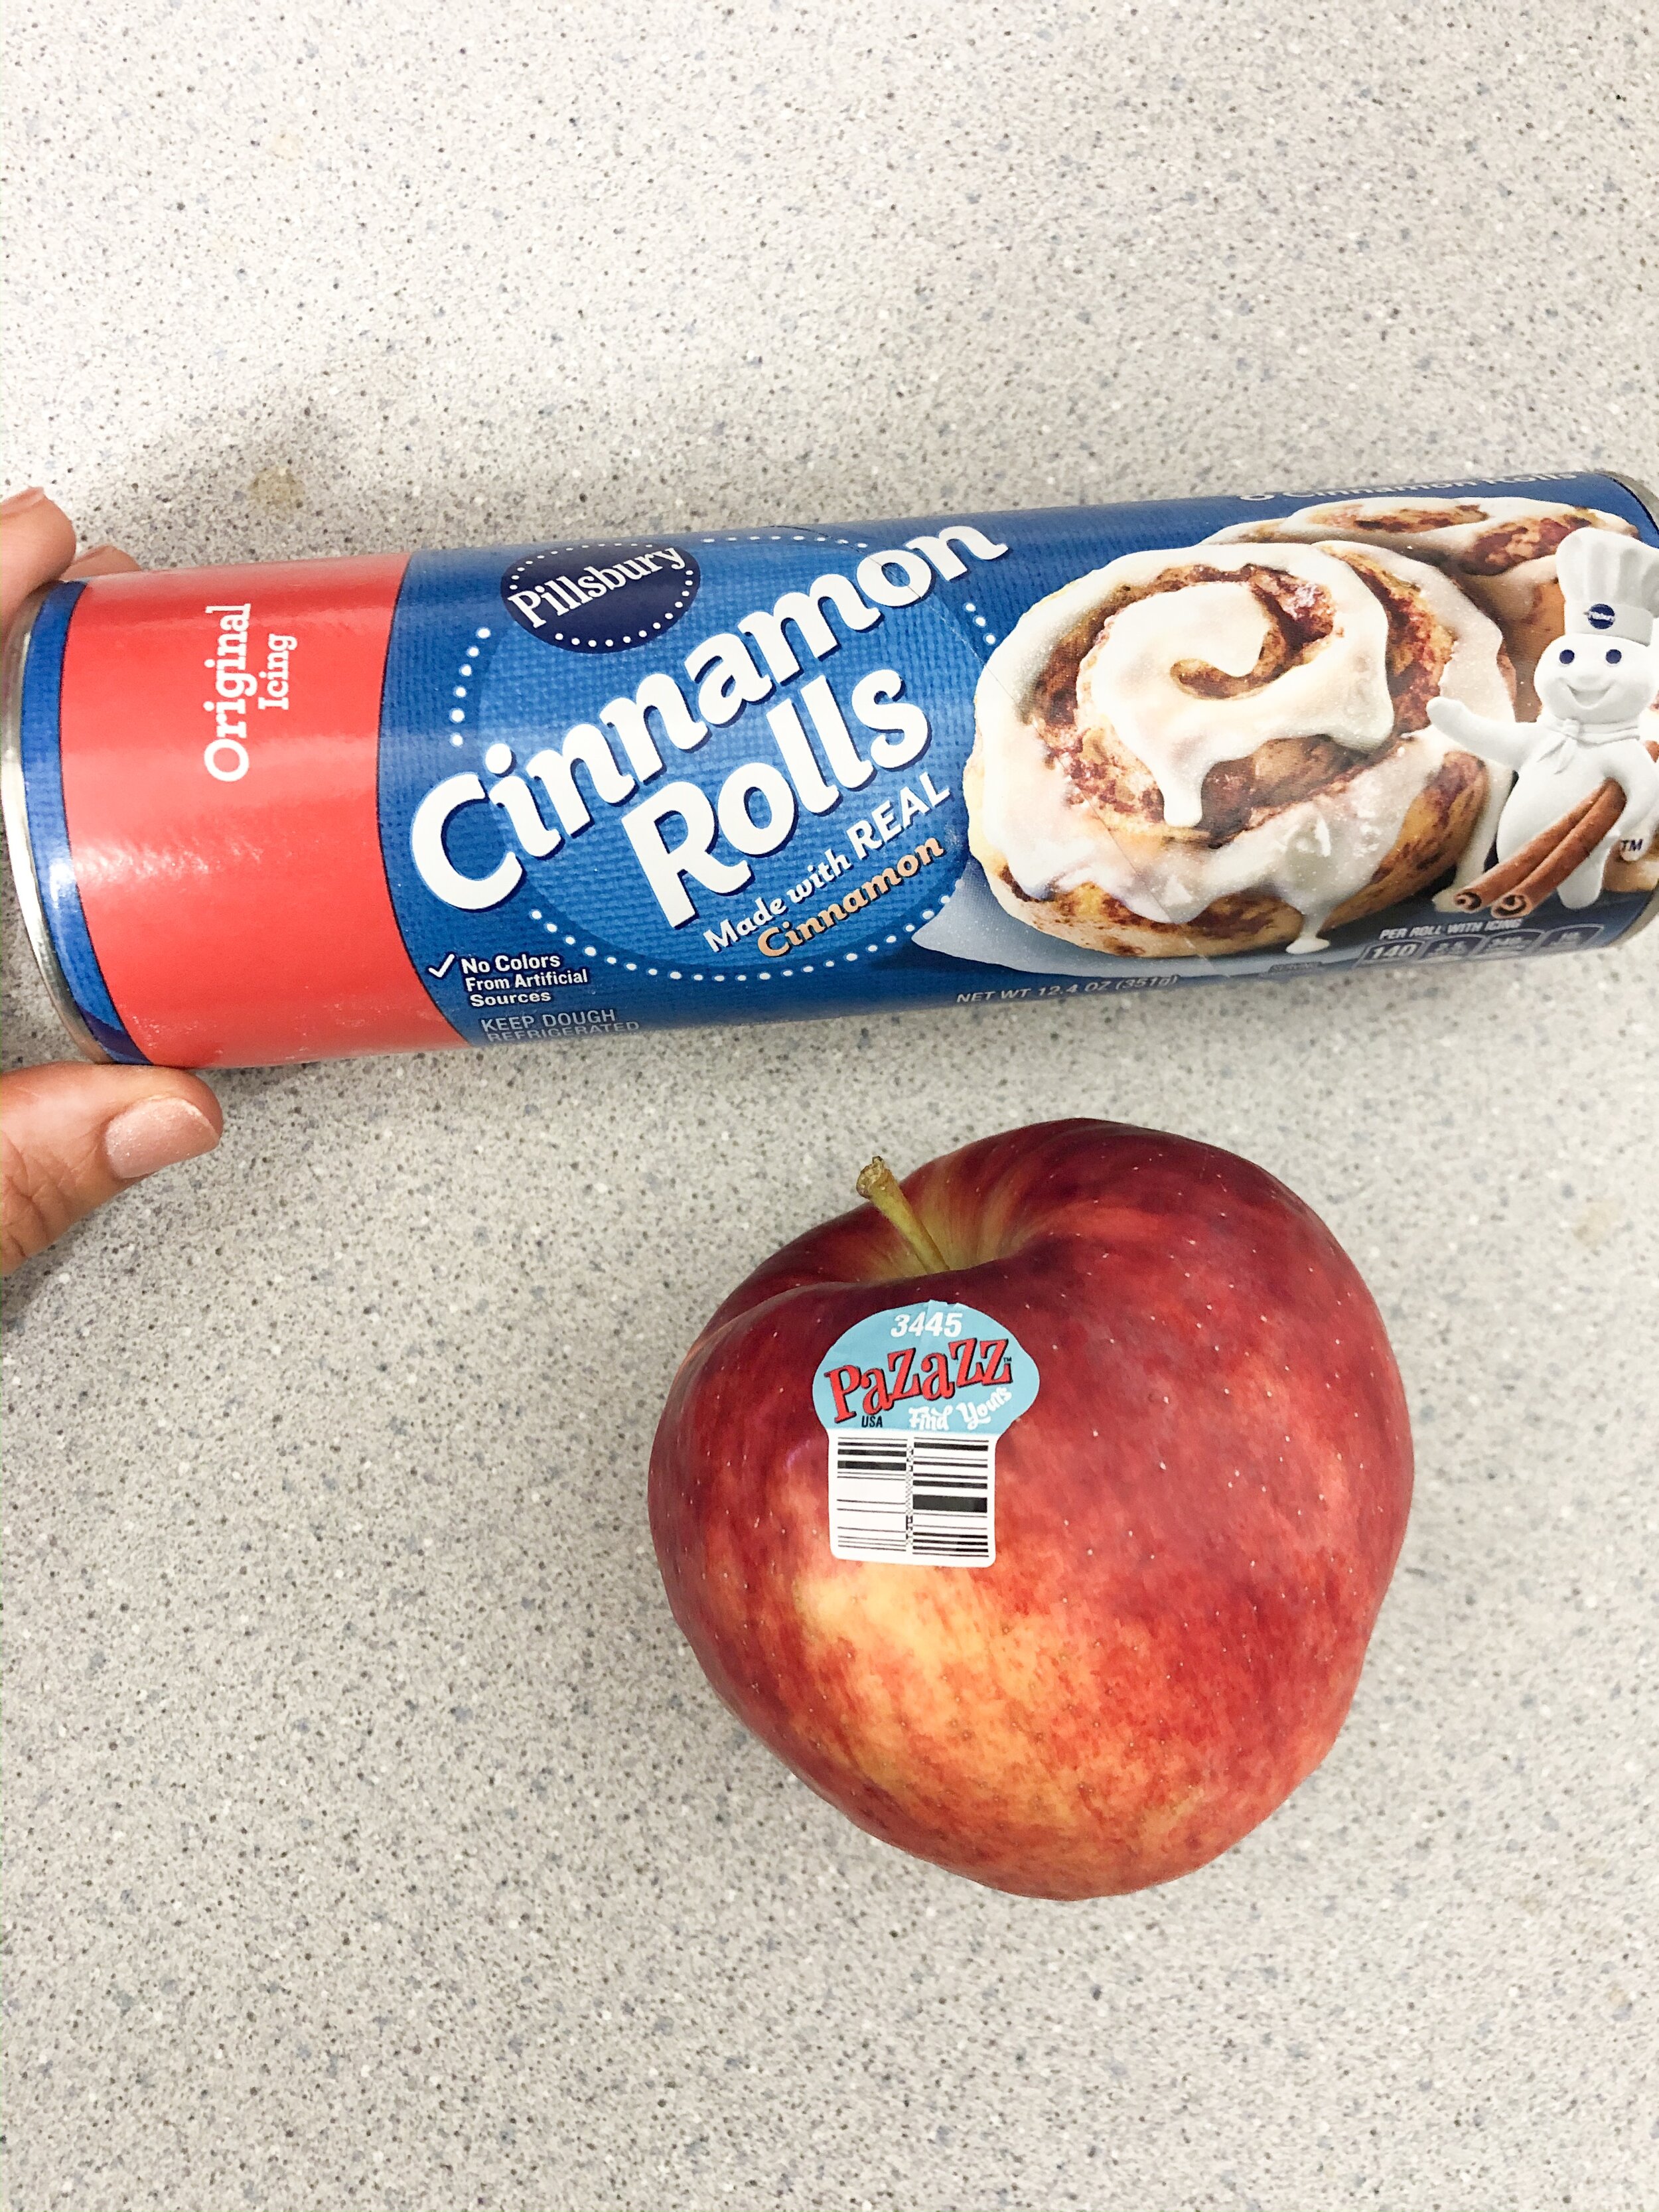
RECIPE: Airfryer AppleCinna Bites

1 Gala or Honeycrisp apple

1 tube of cinnamon rolls

IMG_7023.JPG

DIRECTIONS:

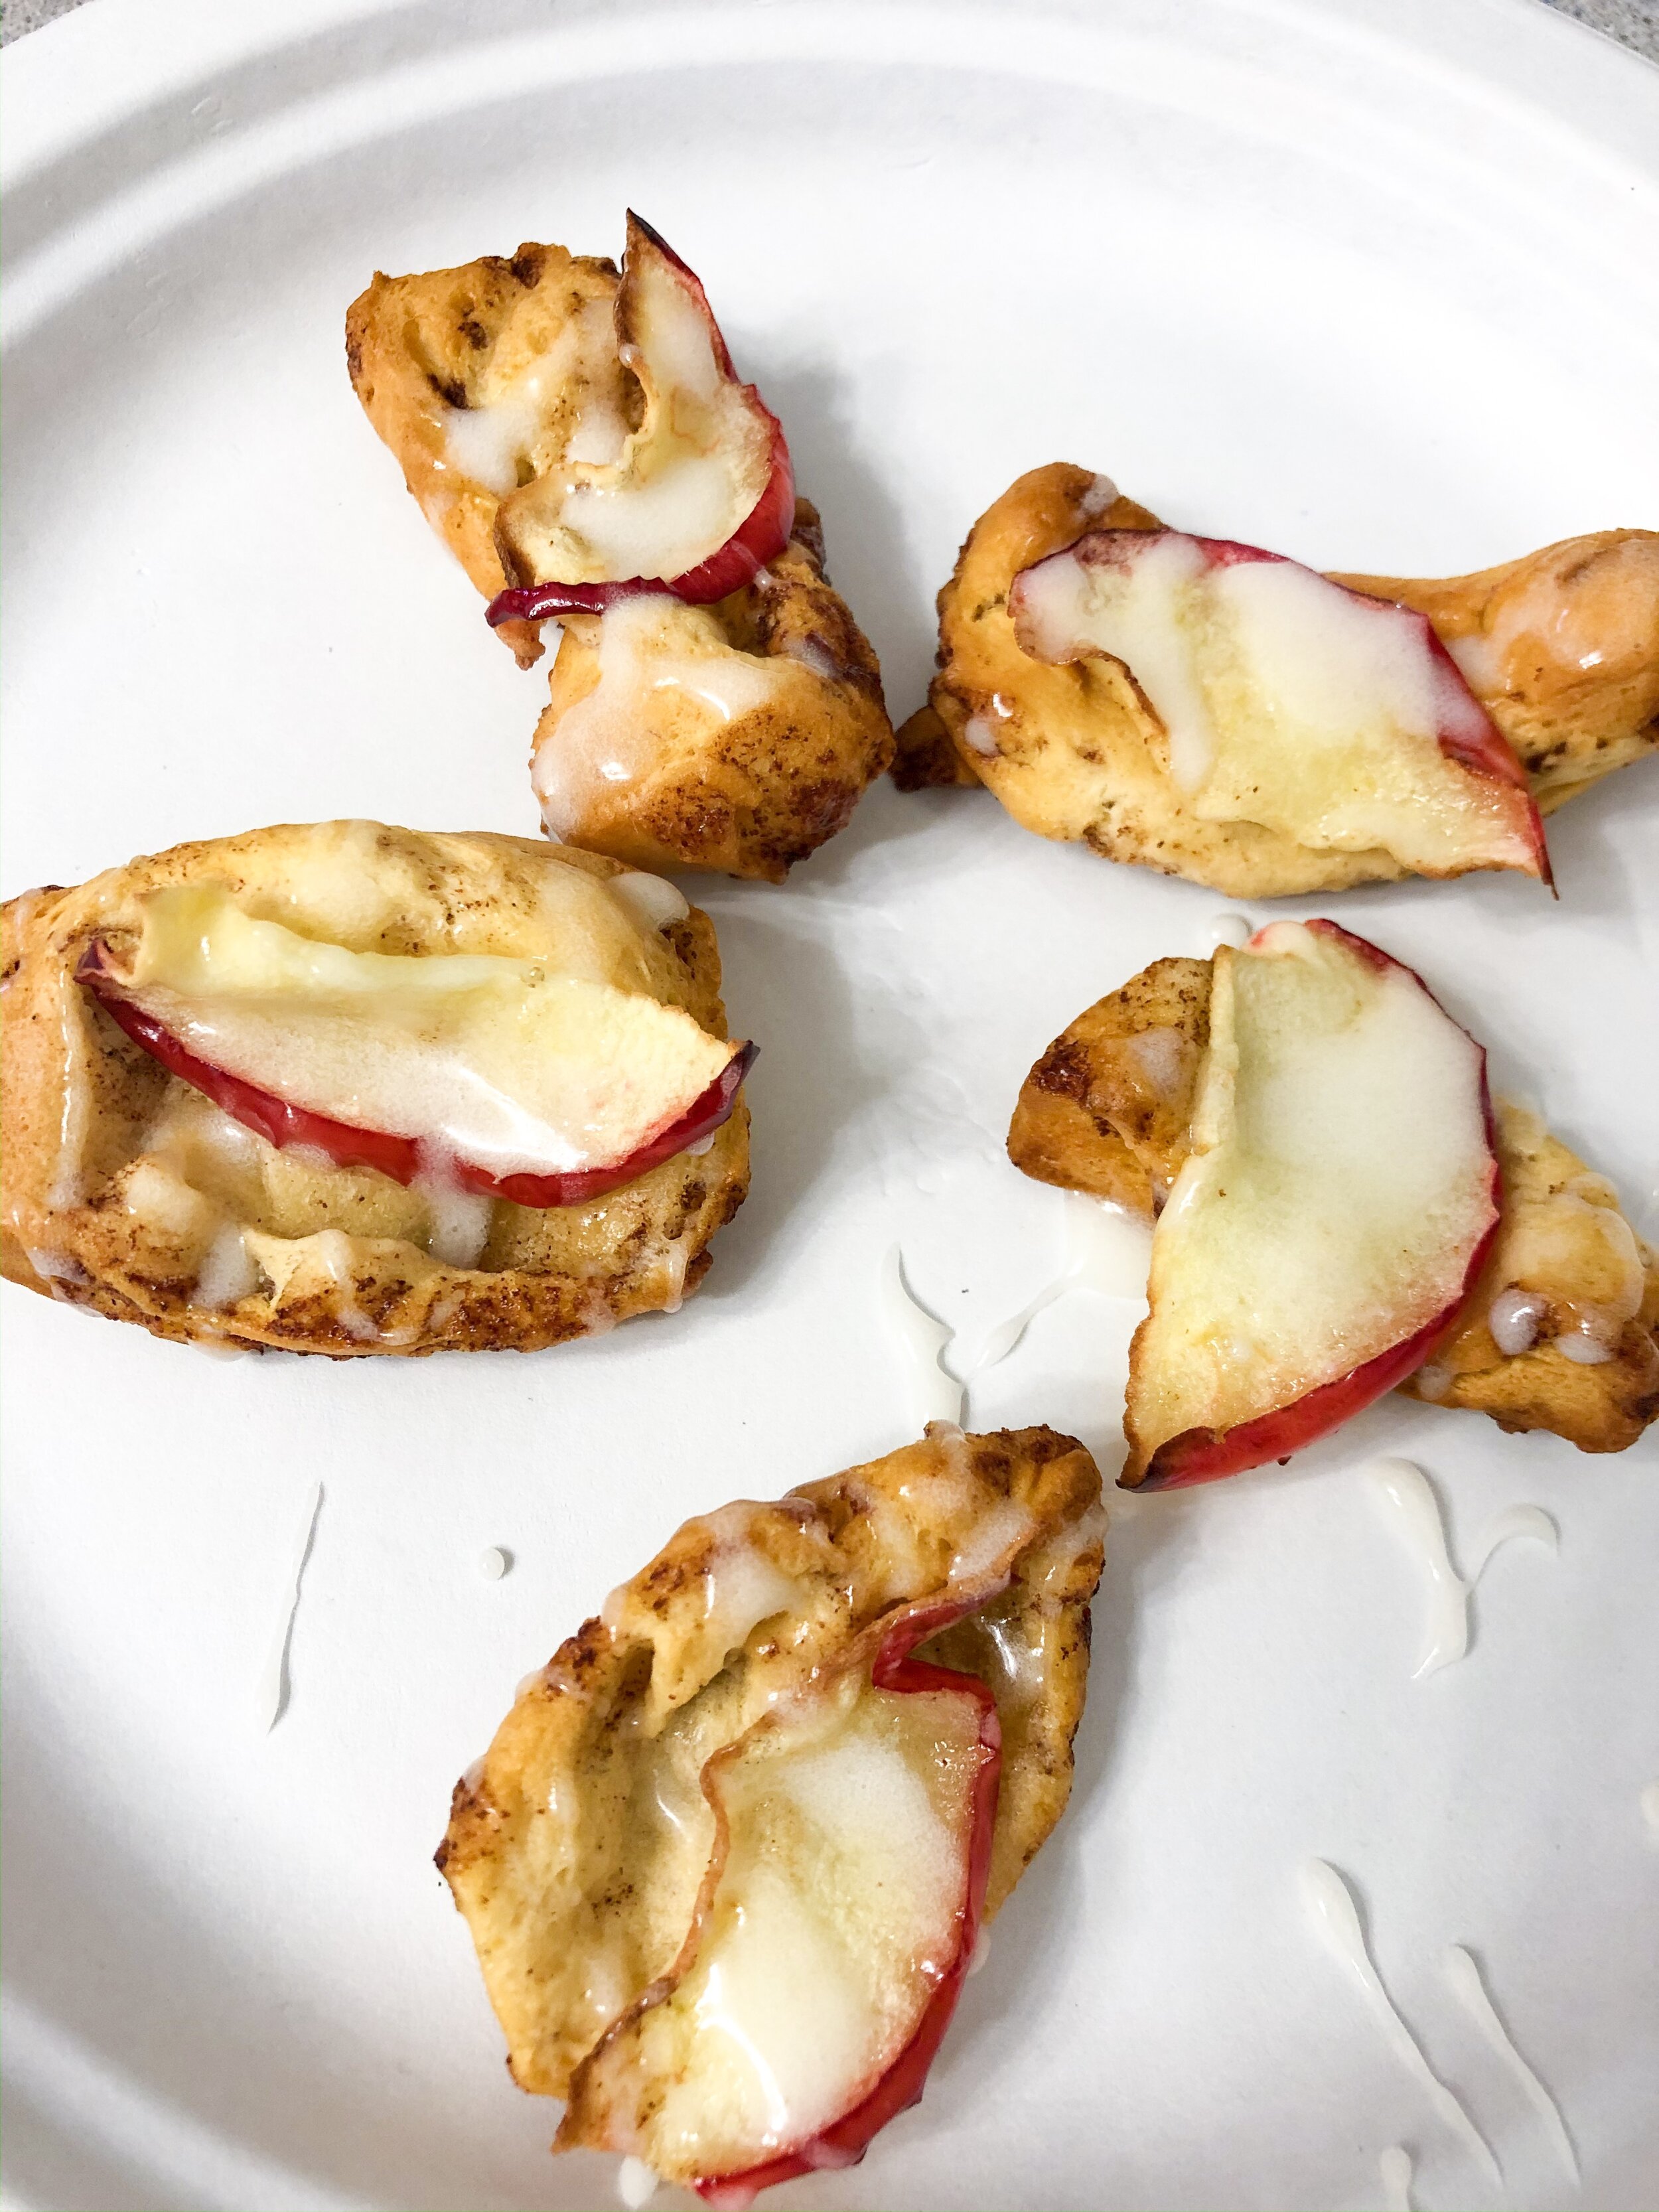
1.) Cut each cinnamon roll into 4 long pieces. I typically only make 2-3 rolls at a time and keep the rest in the fridge for another day!

2.) Slice an apple into thin slices.

3.) Roll the sliced cinnamon roll piece thin enough to wrap around an apple slice. Continue to do this until you have your desired snack amount. I typically make 2 cinnamon rolls at a time for breakfast or a fun snack.

4.) Airfry the pieces at 325-350 degrees for 5-7 minutes or until golden brown.

5.) Heat icing from cinnamon roll tube up in microwave for 10 seconds and drizzle small amount onto the warm apple slices. Serve and enjoy!

IMG_7024.JPG
IMG_7034.JPG

*This is a sponsored post. All thoughts and images are my own.

Flourless Peanut Butter & Banana Muffins

Who said healthy eating can’t be delicious? I am stopping all of the diets and fads and just going back to the basics. Eating healthy, drinking water, and exercising. I honestly have never felt better. I got rid of the bloat (except when aunt flow comes 🀨) rid of the headaches, rid of the mid day slump of feeling like I need a nap, and definitely more regular in my bathroom breaks!

This all kind of stemmed from a visit with my Dad when he was eating everything fresh and here I was trying to eat my thousandth hamburger without the bun 🀒 Definitely over it.

I love carbs and I really love breakfast carbs, like donuts and cinnamon rolls, but those are so bad for you if you consume them on a regular basis. I was playing around with a few recipes and came up with this one that I absolutely love! I hope you love it too and please tag me in your posts so I can see your finished products! Also let me know if you change anything in the recipe!!

Ingredients:

1 ripe banana- mashed

1/4 cup peanut butter- I used Simply Jif

1/4 cup pure maple syrup

1/2 tsp vanilla

1 egg

1/4 cup Original Almond Milk

1 1/4 cup oats

1/2 tsp cinnamon

1/2 tsp baking powder

1/4 tsp baking soda

1/8 tsp salt

few semi sweet mini chocolate chips for garnish

Steps:

1.) Preheat oven to 375 degrees.

2.) Spray muffin tin with non-stick spray. I used coconut/avocado oil spray from Aldi

3.) I used my bullet mixer but you can use a blender to add all wet ingredients to blender and blend until smooth.

4.) Add dry ingredients into the blender and blend until smooth, except for the chocolate chips. Fold those into batter last before pouring into muffin tin or use them as garnish.

5.) Pour batter into greased muffin tin. Bake for 11-15 minutes or until golden brown. (Mine are square because I used a brownie pan)

Serve warm with butter! Enjoy!

Rowan's Apple Cinnamon Bake

If there is ever a perfect time for this recipe, it is now. Warm, sweet comfort food. It all started with a little idea to make some dessert with my daughter Rowan trying to use things we already had in our house. This recipe is probably one of the best yet. Rowan didn’t want to make apple crisp or apple pie, so we came up with this. And of course we had to name it after her!

I only snapped a quick pic of the finished product for my IG story and then y’all wanted the recipe. You didn’t even know it was good yet but we ate the entire pie plate of it πŸ˜‚ So naturally, I needed to make it again so I could β€œtake photos” of the steps to post the recipe. See what I did there? Haha we nearly ate the entire thing again.

This would be great for breakfast too or even yummy to double and make in a casserole dish for a cookout.

IMG_2343.jpg

INGREDIENTS:

1 tube cinnamon rolls

1 jumbo honey crisp apple or 2 medium sized ones

1/4 tsp nutmeg

1 Tbsp water

1 Tbsp brown sugar + 1/3 cup brown sugar

5 Tbsp butter

DIRECTIONS:

1.) Preheat oven to 350 degrees. Grease pie plate with cooking spray.

2.) Core, cut, and peel apple. Dice into small pieces. Place in a small microwaveable dish. Add the 1 Tbsp brown sugar and 1 Tbsp water, coat apples. Cover with syran wrap and cook for 3 minutes to soften them. Drain excess liquid.

IMG_2344.jpg

3.) Cut cinnamon rolls into pieces and spread evenly into pie plate.

IMG_2345.jpg

4.) Add cooked apples to the top of cinnamon roll pieces.

5.) Melt the butter and 1/3 cup brown sugar in the microwave for 40 seconds or until melted. Spread evenly over apples and cinnamon rolls.

IMG_2347.jpg

6.) Bake at 350 degrees for 28-30 minutes or until golden brown. Remove from oven and allow to cool for a few minutes.

IMG_2349.jpg

7.) Take frosting from the cinnamon rolls and heat in microwave for 20 seconds. Drizzle over the apple bake.

8.) Serve warm and enjoy!

IMG_2352.jpg

Chocolate & Peanut Butter Sheet Cake

I mean duh! Is there even a better combo out there than chocolate and peanut butter? I will wait…. In the confinement of social isolation right now I have been trying to find things I love doing but never took the time to do. Reading, baking, family games, and puzzles. Funny how once everything is erased from your social calendar, you find time for the simpler things in life.

This recipe is really easy to make so involve your kiddos! They can even taste the batter safely as there are no eggs πŸ˜‰

I also cut this recipe in half because Lord knows I do not need any more sweets laying around then I already have. It was actually the perfect amount and I used a cake pan instead of a jelly roll. If you make the whole recipe, use a jelly roll pan.

Tag me in your photos if you make any of my recipes! I love to see them! @ladyandredstyle

Chocolate Cake:

1 cup butter

1 cup water

1/4 cup cocoa powder

2 cups flour

2 cups sugar

1 tsp baking soda

1/2 tsp salt

1/2 cup sour cream

Peanut Butter Icing:

3 cups powdered sugar

1/3 cup + 2 Tbsp milk

6 Tbsp butter- melted

1 tsp vanilla

3/4 cup peanut butter

For The Sheet Cake:

1.) Preheat oven to 350 degrees. Combine butter, water, and cocoa powder in a saucepan, then bring to boil. Remove from heat and set aside to slightly cool. Could microwave too.

2.) Whisk together flour, sugar, baking soda, and salt in a large bowl then create a well in the center. Add cocoa mixture and whisk until smooth. Add sour cream stirring until smooth.

3.) Pour cake batter into a non-stick sprayed jelly roll pan, spread evenly. Bake for 15-18 minutes until toothpick comes out clean.

For The Icing:

1.) Whisk together powdered sugar, milk, melted butter, and vanilla in a bowl. Add the peanut butter and microwave for 30 seconds. Whisk to combine until smooth.

Frost & Serve!

**I pour the frosting over the cake while warm because I like it to melt into the cake. I also like to microwave leftover cake for 10-15 seconds and eat with coffee!